What that chalk
actually is.
Paint is pigment held in a resin binder. Sunlight breaks the binder down from the top, a few microns at a time, year after year. Once the binder at the surface has gone, the pigment it was holding has nothing to hold it. It sits there loose.
That is the chalk. It is your tractor's colour, dead, sitting on top of the paint that is still alive underneath. Which is why every product that promises to restore faded paint out of a bottle disappoints you. Oil and wax soak into the chalk and darken it for a few weeks, and then it rains and you are back where you started. You cannot feed a layer that is already dead.
The only thing that works is taking it off.
The thumb test
Rub a clean thumb hard across the worst panel on the machine. If it comes away powdery and the paint where you rubbed looks a shade darker than everything around it, you have oxidation and there is good colour underneath. That is a correctable machine.
Then try the water test. Splash a patch of hood and look at it while it is soaking wet. Wet paint looks roughly like corrected paint. If the colour comes back deep and rich under the water, that is what I can get you back permanently. If it stays flat and grey even soaking wet, the fade has gone deeper than the surface and you are into repaint territory.
Those two tests take thirty seconds and they tell you more than a phone call will.
Why farm paint is
a different job.
Most detailers learn on cars, and cars have a clear coat. It is a hard sacrificial layer sitting over the colour, and when you polish a car you are cutting into clear, not into paint. There is a margin for error built into the finish.
Plenty of agricultural iron ran single-stage enamel with no clear at all. The colour is right there at the surface with nothing over it, taking full sun every day of every summer for thirty years. When I cut a single-stage hood, I am removing colour. There is a finite amount of it and it does not grow back.
That is the whole reason I work the way I do. I start with the least aggressive combination that will do anything at all, test it on a panel where a mistake would not be visible, and step up only when the gentle version proves it is not enough. It is slower. It is also the difference between a machine that looks new and a machine with a burned-through edge on the hood corner.
What each colour does
Red is the worst of them, and it is not close. Red pigment breaks down faster under UV than any other colour in agriculture. An old red machine goes pink, then powdery, while a blue one of the same vintage still looks respectable in the yard. It is also the most rewarding colour to correct. The tape line down the middle of a half-done red hood looks like two different tractors.
Green chalks rather than shifting colour. It goes pale and milky instead of turning a different shade, and the yellow trim and wheels almost always dull off well before the green does, which is why a Deere can look tired even when the hood is not that bad yet.
Orange sits in the middle and always looks worse than it is, because dust hides in orange better than in anything else. Blue holds up best. On blue machines the failure point is usually the decals rather than the paint.
How the correction
actually goes.
- Wash and degreaseEverything comes off first. Chaff, dust, baked-on grease, whatever the exhaust has cooked onto the hood. Polishing over grit is how you grind swirl marks into the paint you were hired to fix.
- DecontaminateIron remover and clay across every panel. Farm paint collects embedded metal from brake dust, grinding, road salt and rail dust, and none of it washes off. You can feel it through a plastic bag over your hand. It has to come out before a pad touches the panel.
- Test panelOne small area, gentlest pad and compound first. This is where I find out what the paint has left in it and what the machine is actually going to need. It also tells me whether the machine has been polished hard before, which changes everything.
- CutThe pass that removes the oxidation. Compound on a cutting pad, worked panel by panel, checked constantly in raking light. Slower near edges, high spots and anything with a decal on it.
- RefineCutting leaves fine haze behind. A polish pass, and on badly gone paint a second one, takes the haze out and brings the gloss up. This is the step people skip, and it is the reason some corrected machines look bright but not deep.
- ProtectBare corrected single-stage paint has no protection on it at all and will start oxidizing again immediately. It gets a sealant wax or a ceramic coating before I leave. This is not optional on a machine that lives outside.
The same panel,
the same day.
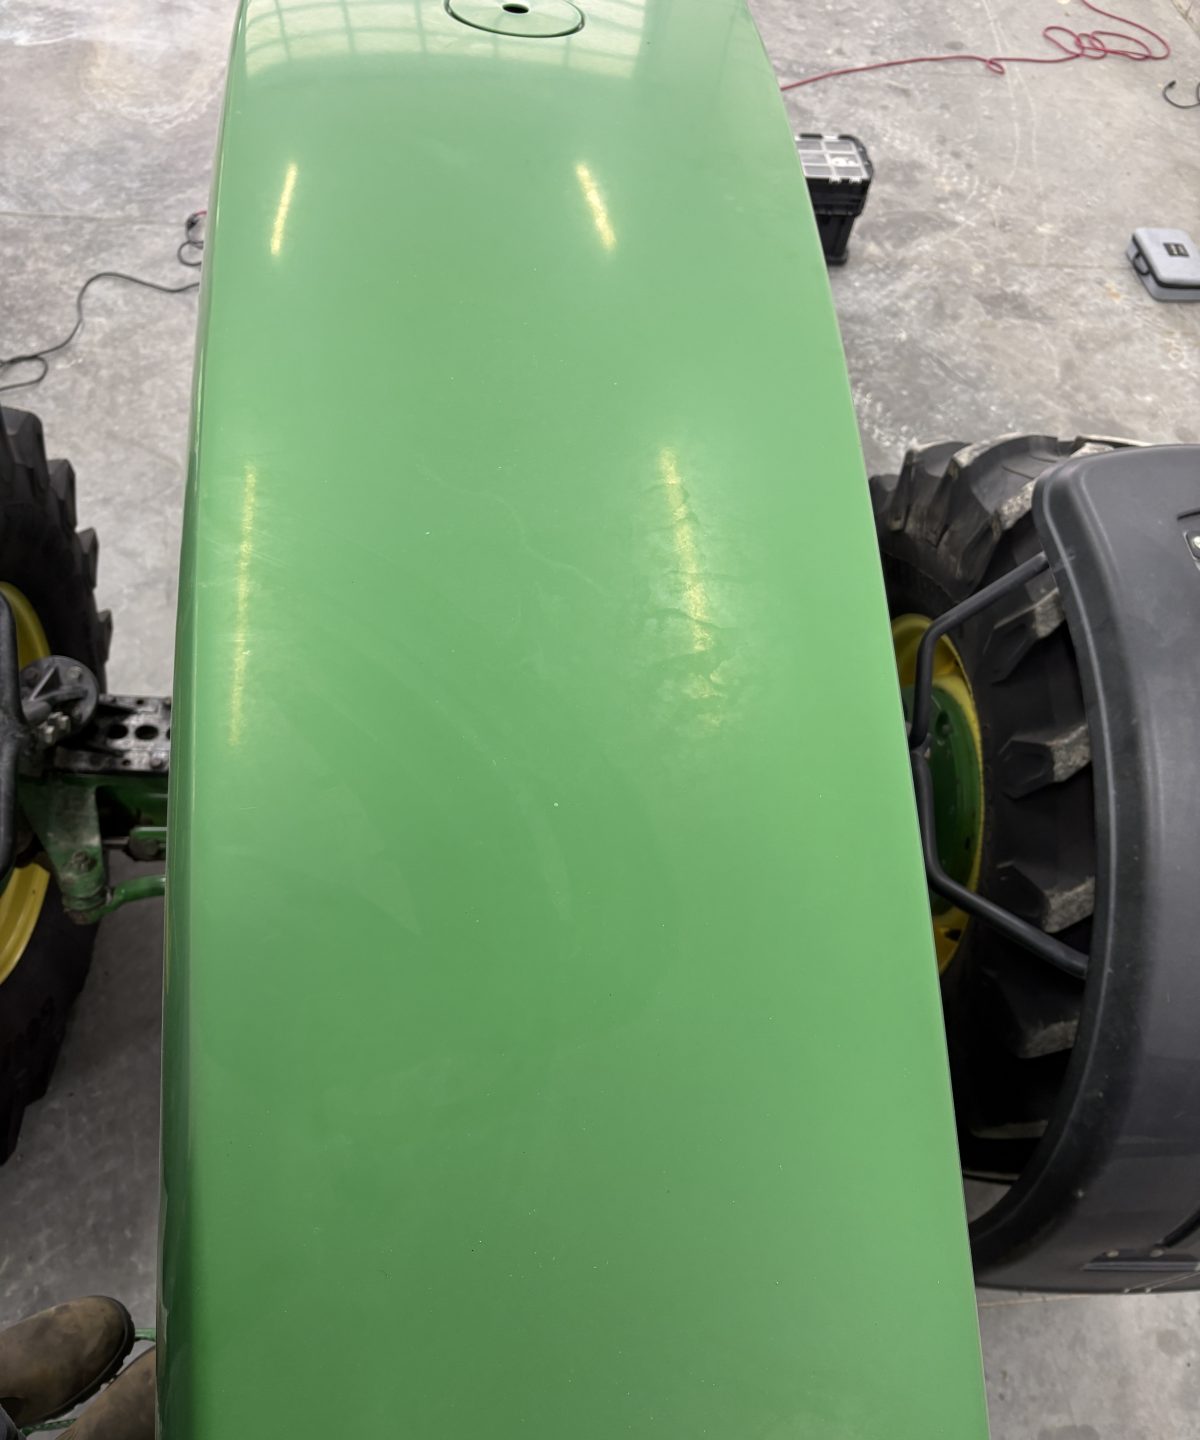
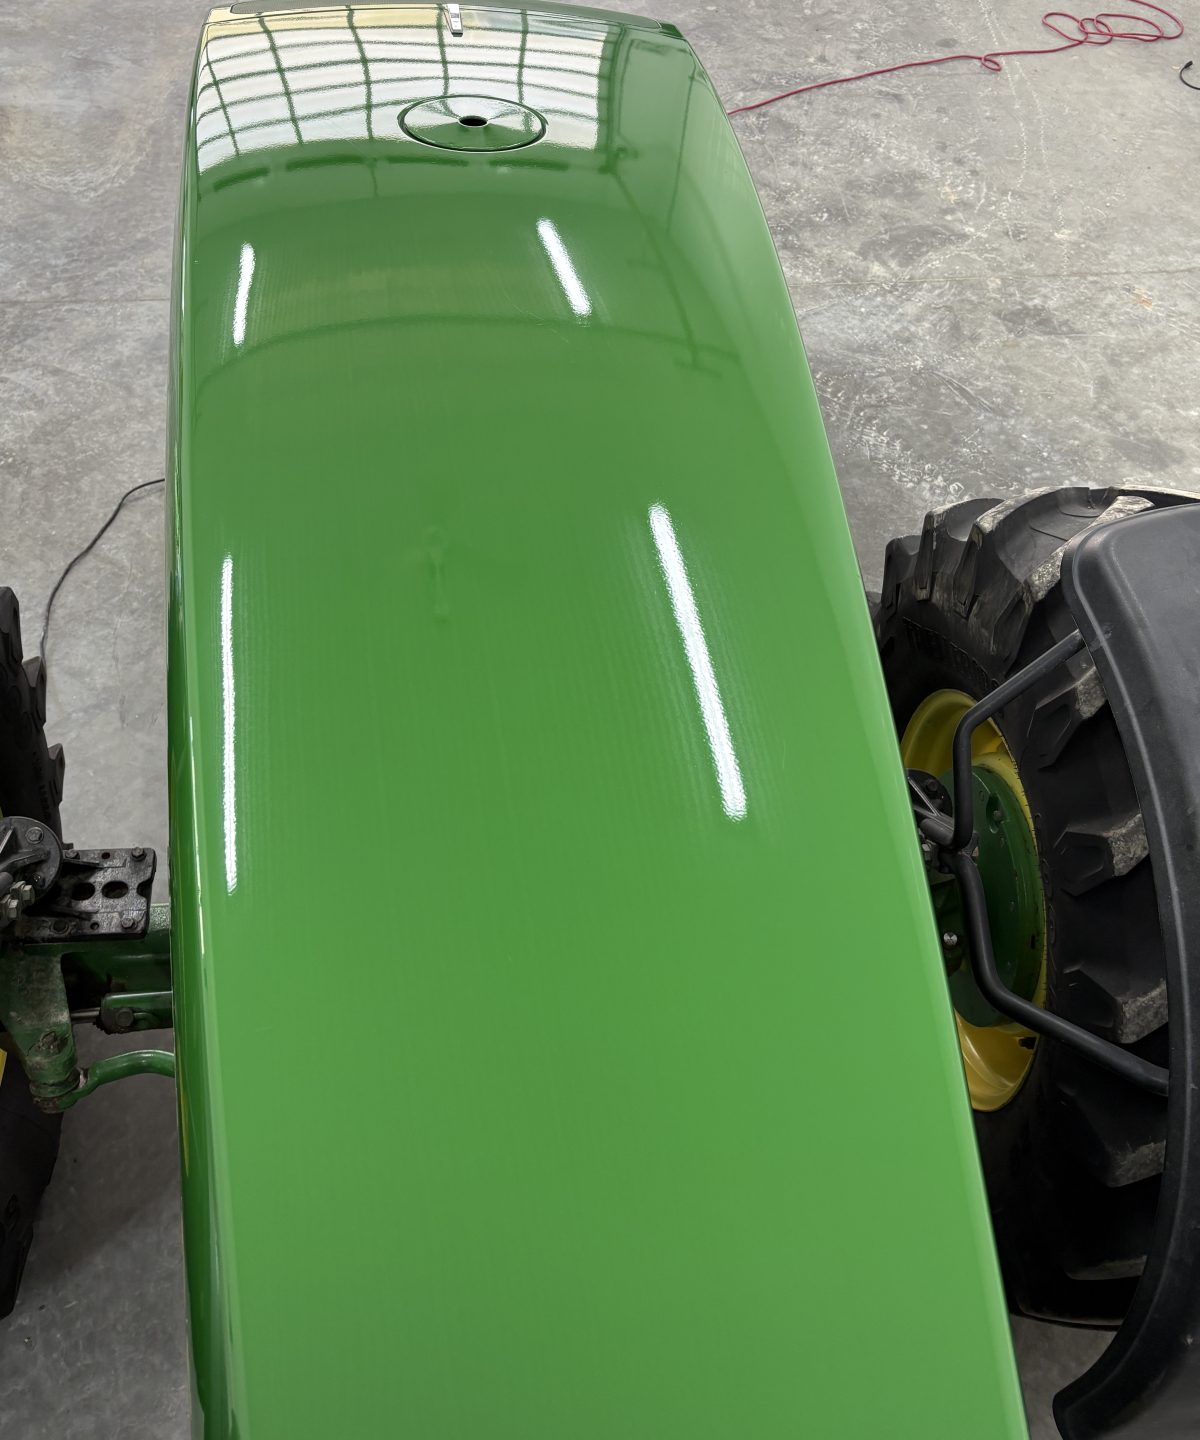
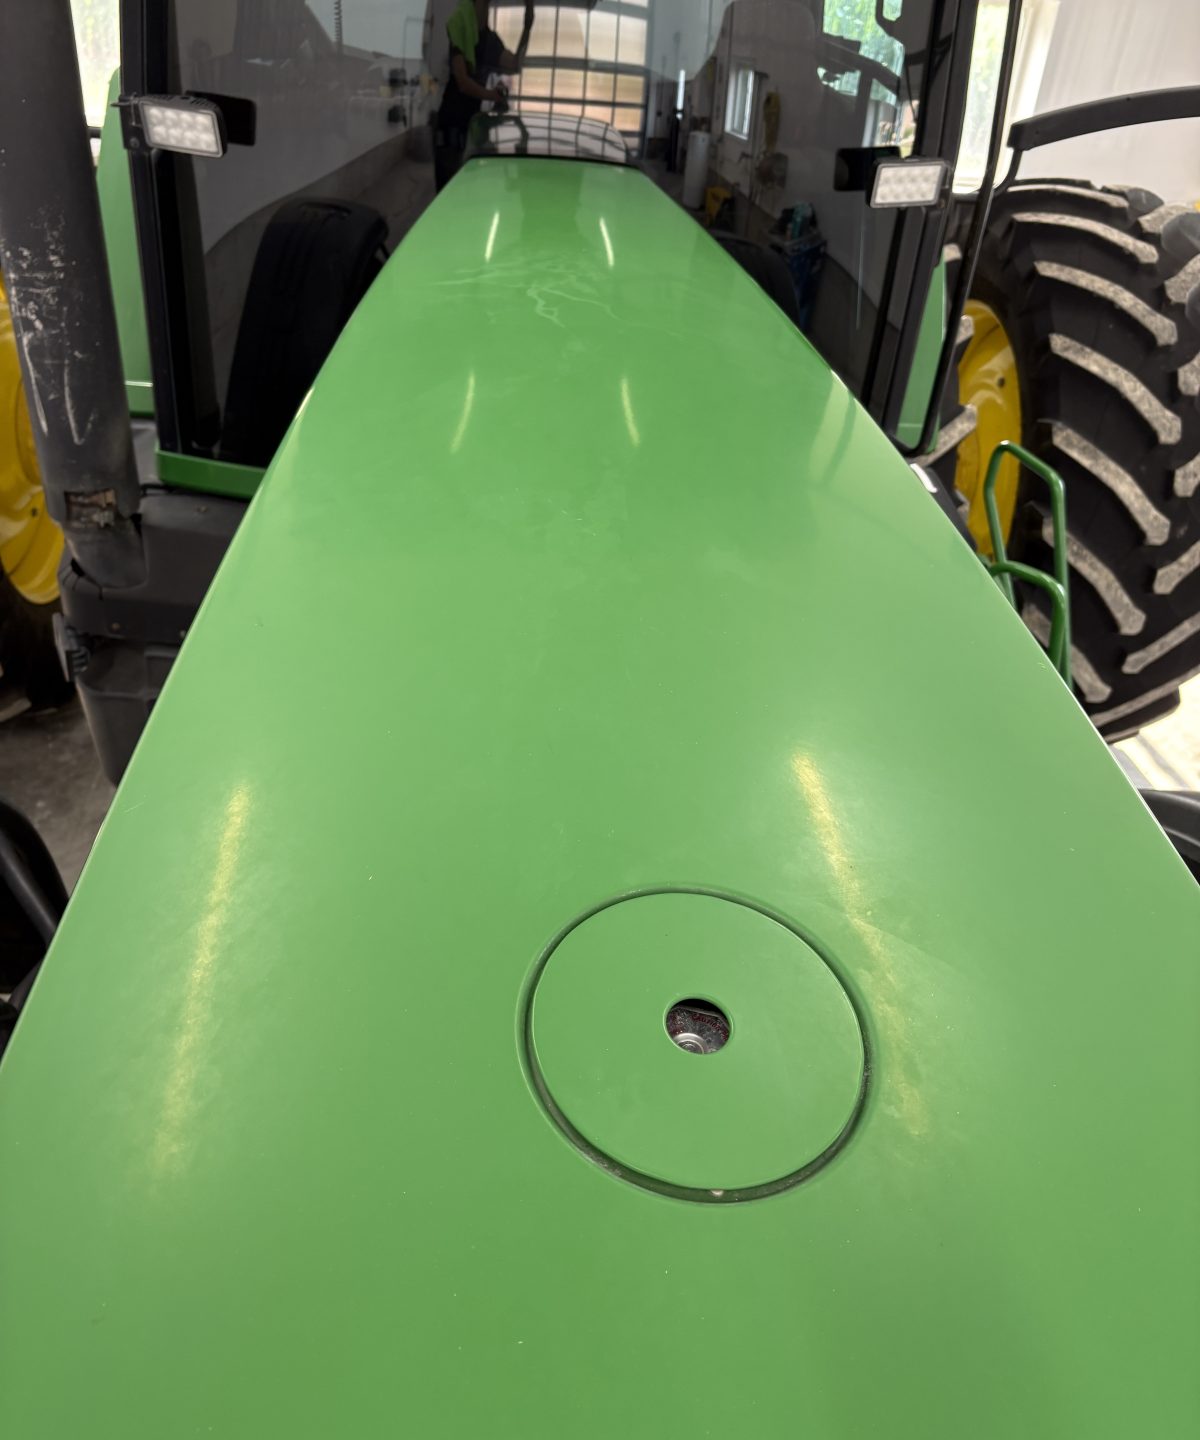
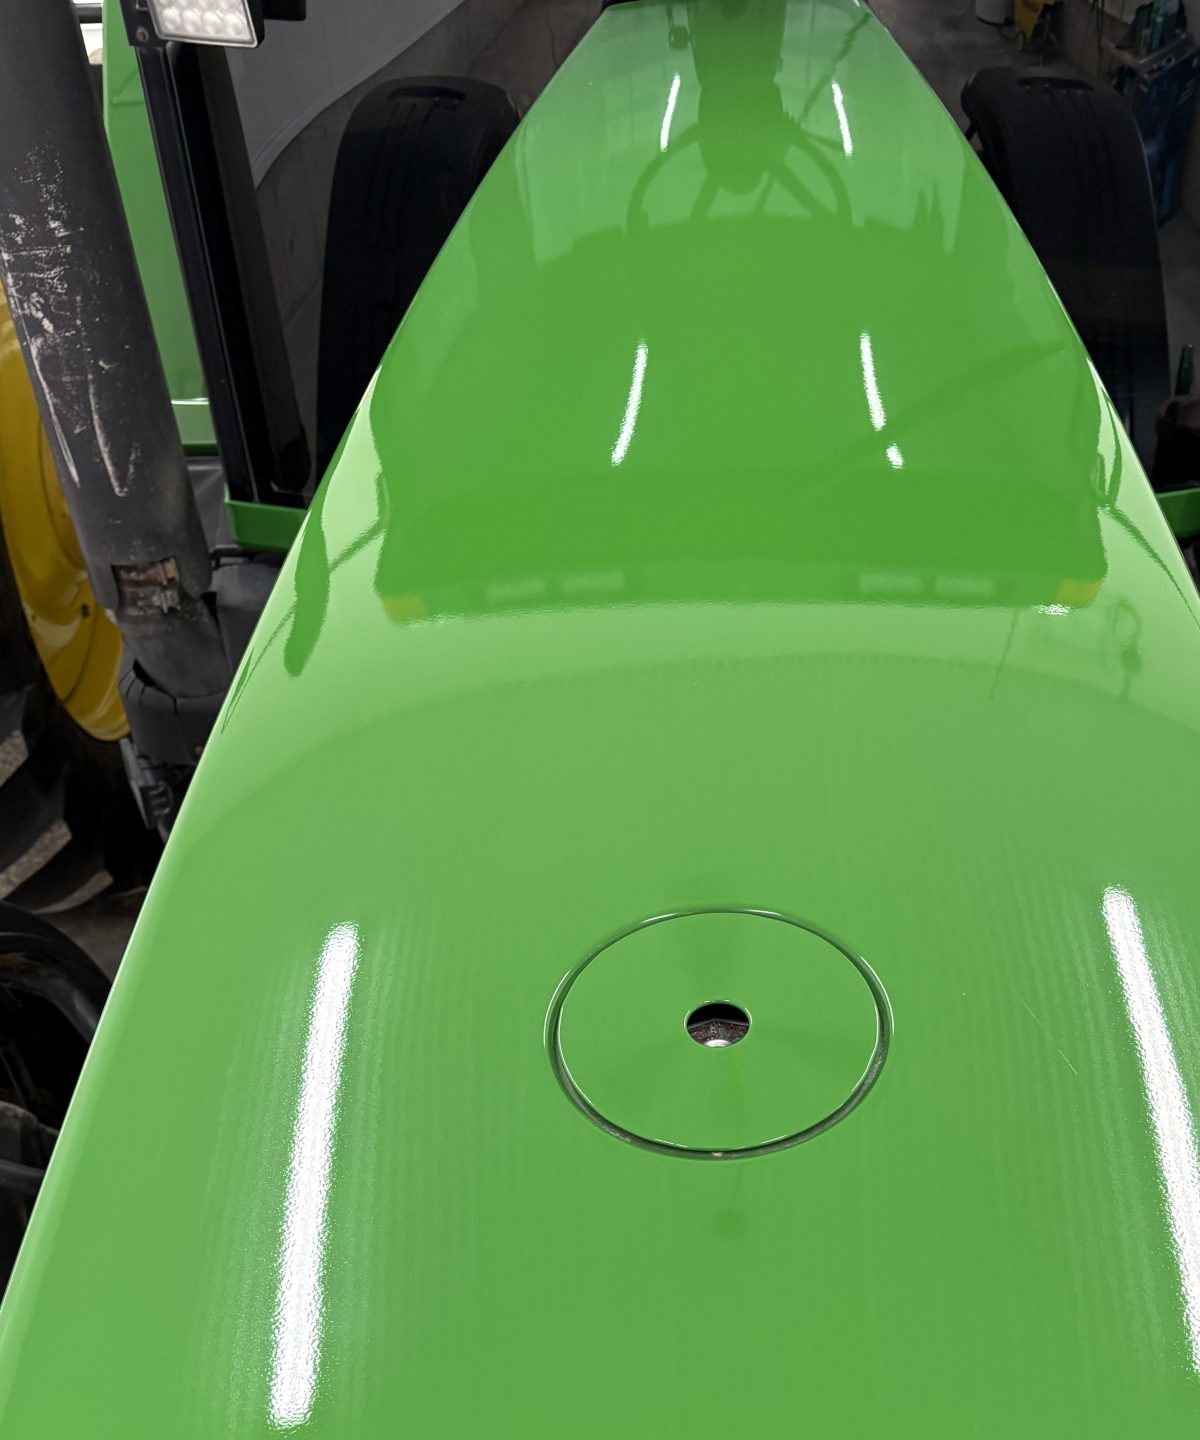
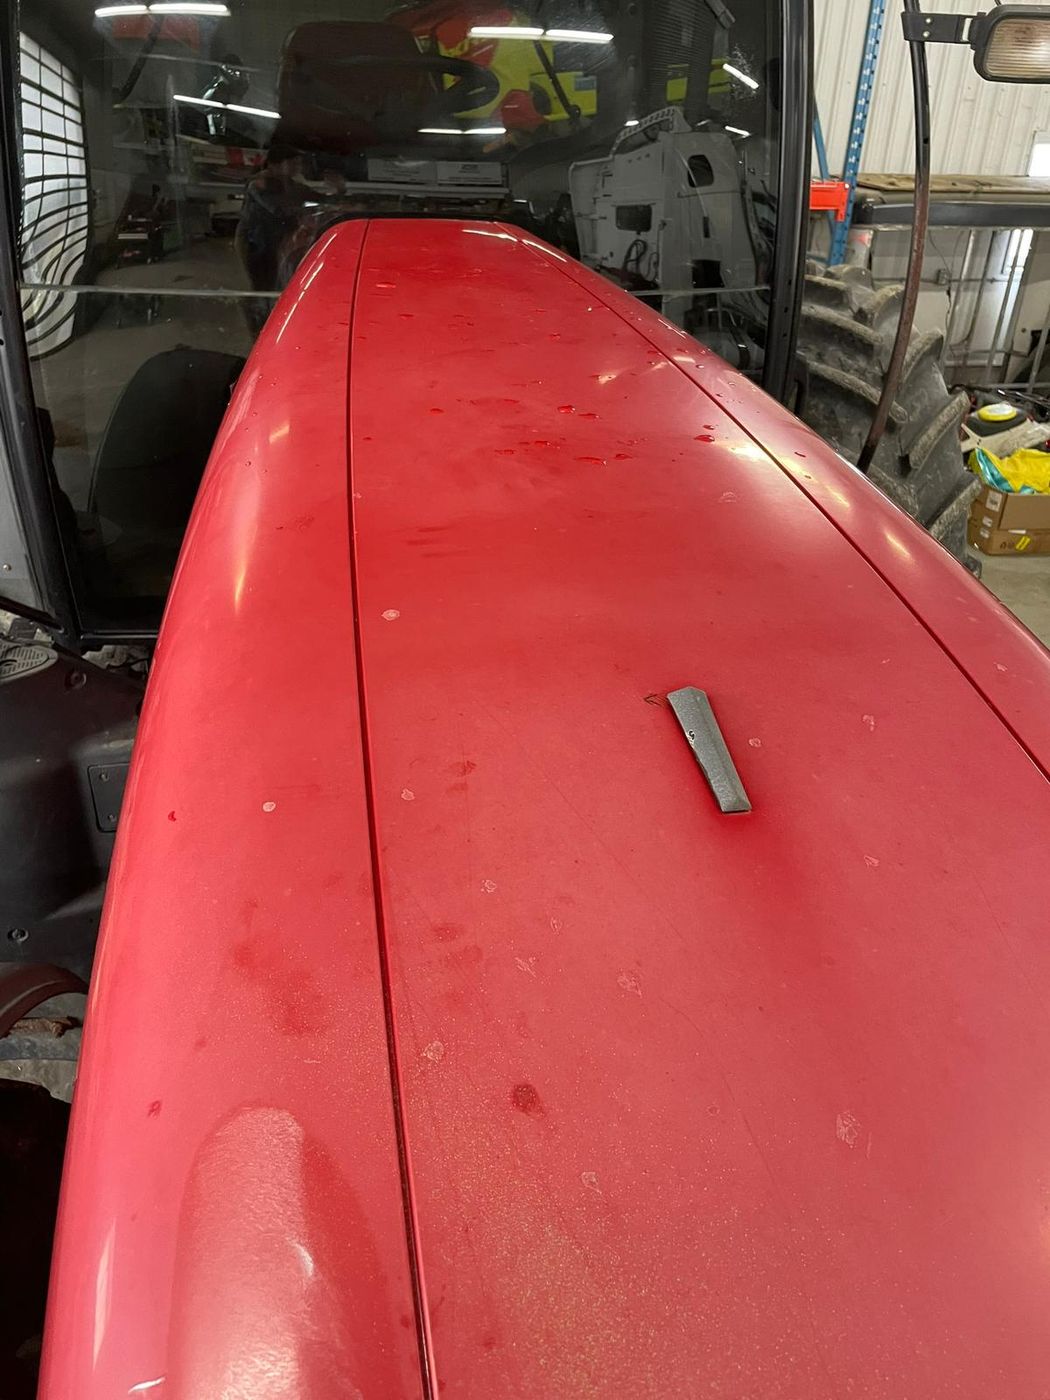
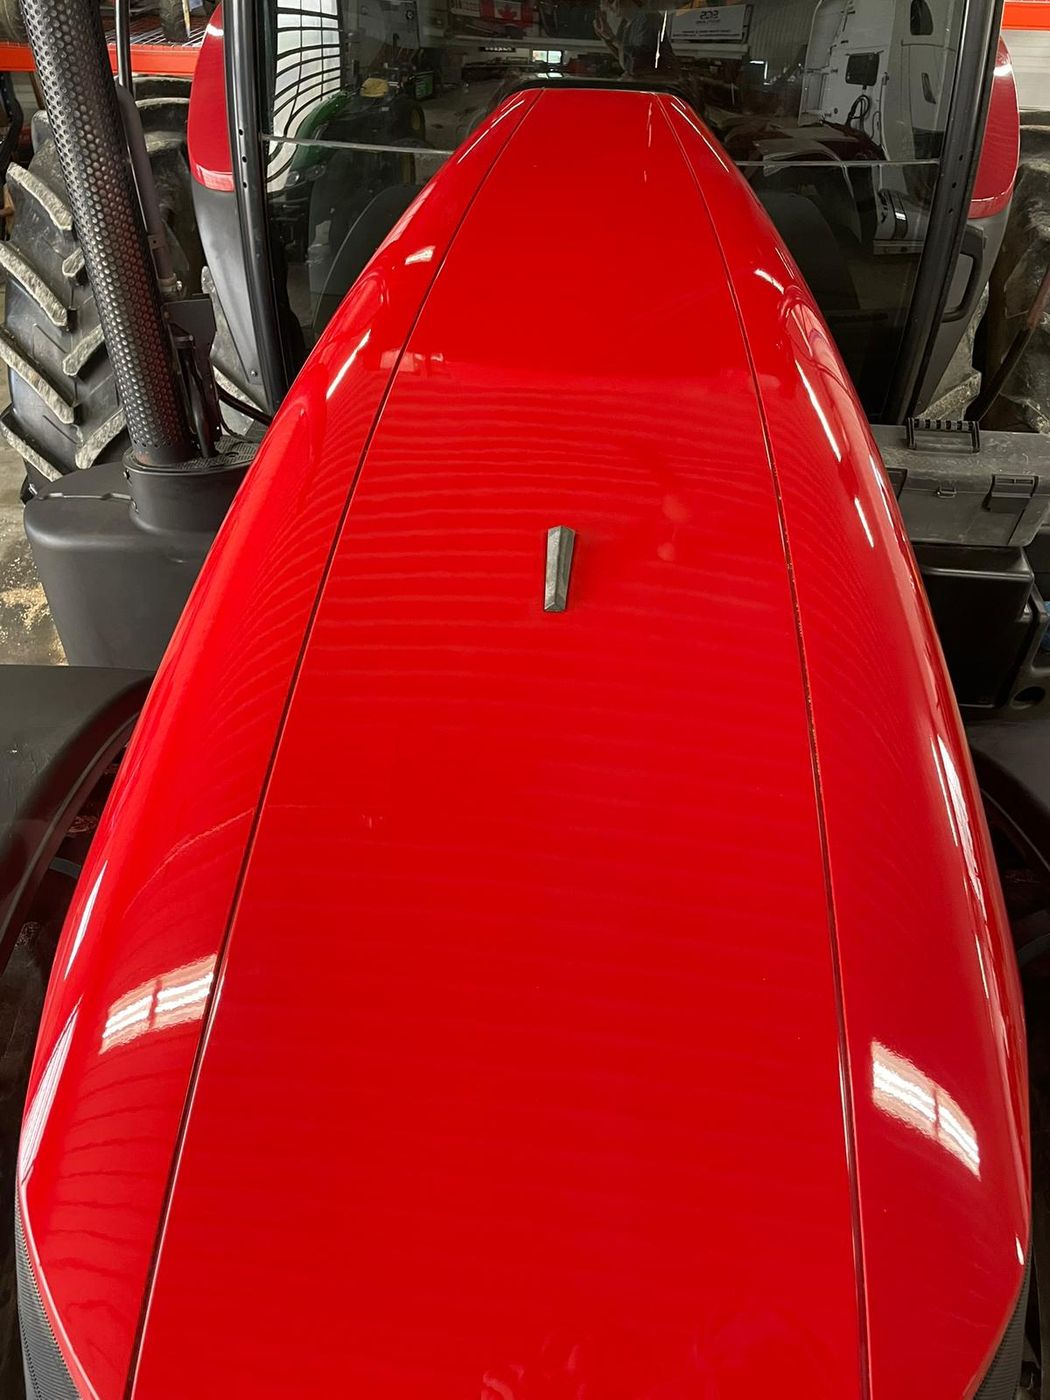
When to stop trying.
I would rather talk you out of a job than take your money for something that is not going to work. There are machines I turn down.
Worn through to primer. Look at the high spots. Hood corners, the ridge over the fender, anywhere a hand or a sleeve has brushed past for twenty years. If there is grey or white showing through the colour, that panel has no paint left to correct and cutting it will only make the bare patch bigger.
Already corrected hard once. If a previous owner had it polished aggressively, the colour that is left may be thin enough that another pass is a real risk. I can usually tell from the test panel.
Cracked or checked. Fine cracking across a panel, like dried mud, means the paint film itself has failed. Polishing a checked panel makes it glossier and does not make it better. That is a repaint or a leave-alone.
Not worth it on value. If the machine is a working unit with no sale planned and the paint is genuinely gone, a wash, a cab clean and a wax is honest money well spent, and a full correction is not.
What it costs.
Correction is priced per machine, because condition drives the hours far more than size does. A tidy 8R that just needs one pass can take less time than a badly gone utility tractor that needs three. These are starting points.
Larger row-crop and articulated machines go up from there. Travel inside about thirty minutes of Fergus is included, past that it is $0.60 per kilometre, and you get a firm number before I start rather than after.
Condition sets the price, not the model. Two tractors off the same line can be a day apart in work depending on how they were stored, so I price on condition. Text me a few photos — the hood, the worst panel, the cab — and I can give you a real number over the phone. Most of my quoting happens exactly that way. I confirm it against the machine when I arrive, before any work starts.